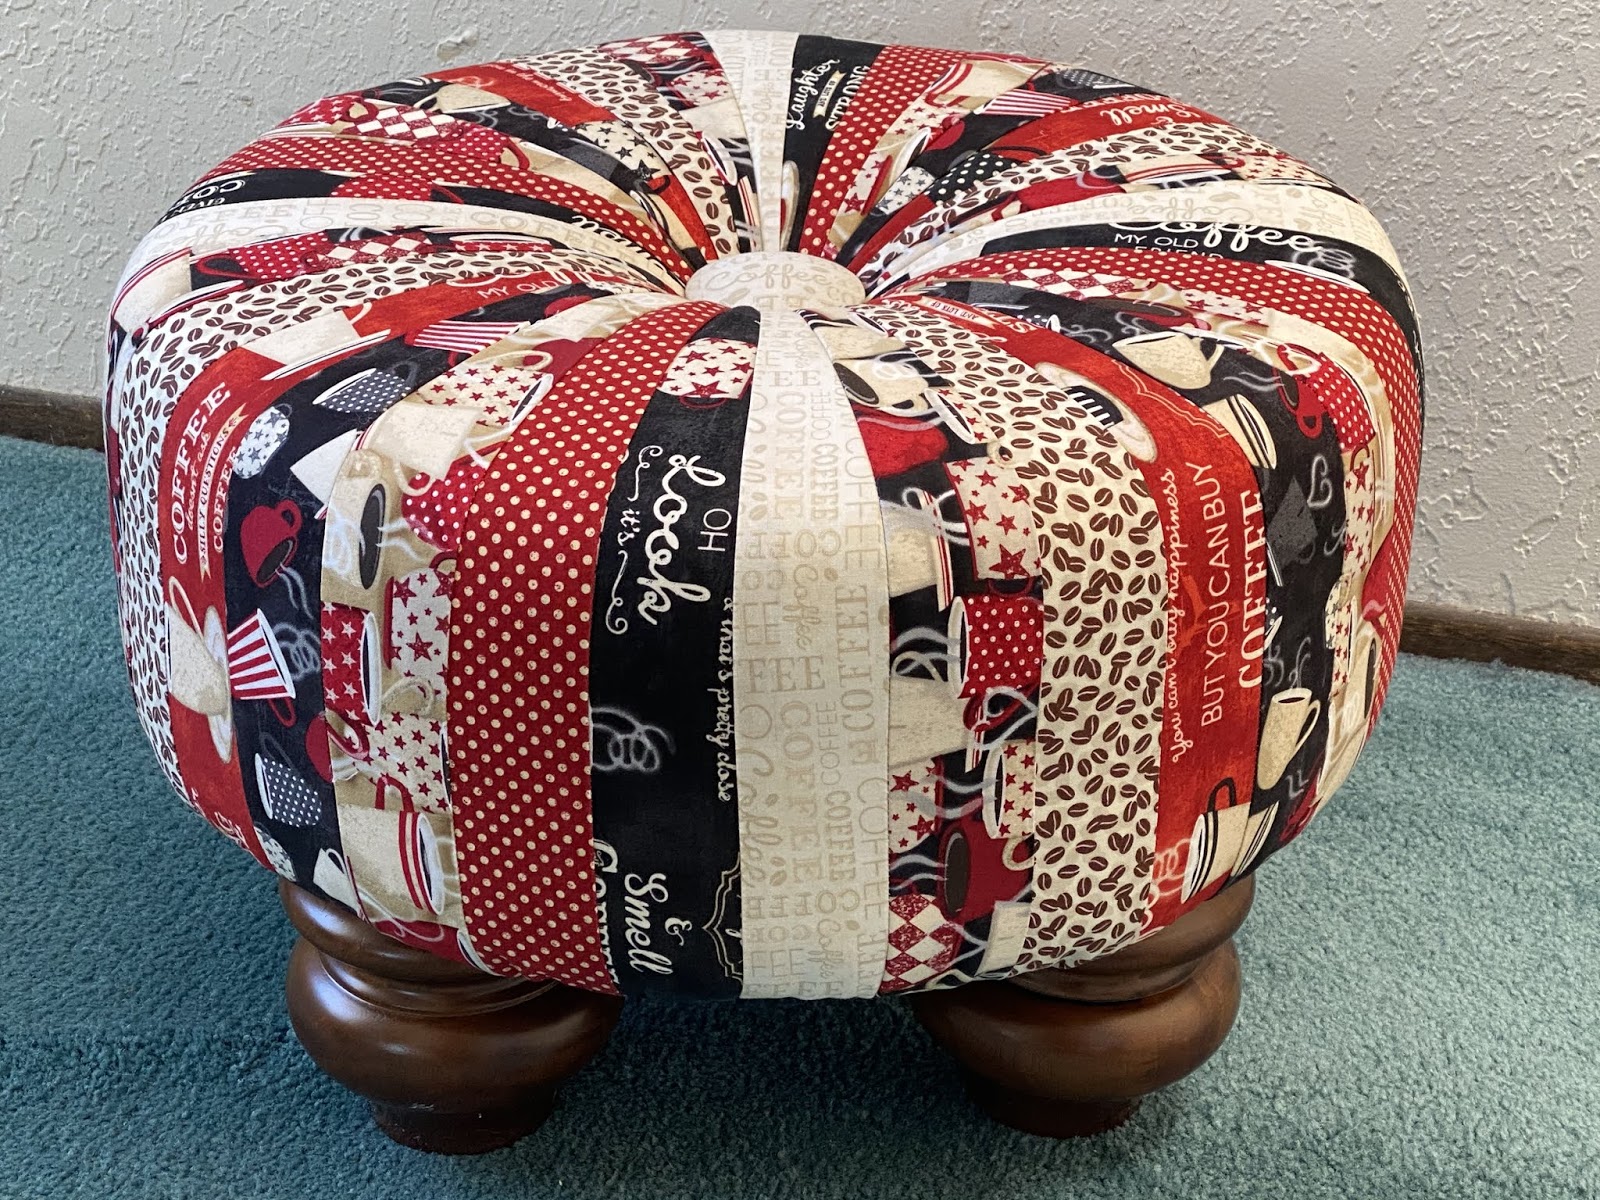
I could straightaway visualize it being used to pop feet up on, whilst relaxing and drinking coffee.
I started out by working out my pattern, I needed to choose 8 of the fabrics for my design and took a few photos to be sure which fabrics worked well next to one another, it gave me time to shuffle things around.


I then cut my fabrics 3” x 21” and created stacks for each set to be sewn.
I already had my muslin cut ready to use.


I Then trimmed off the excess material.

Completed all sets according to my pattern.


Next laid out my trimmed eighths so I knew which to sew together.

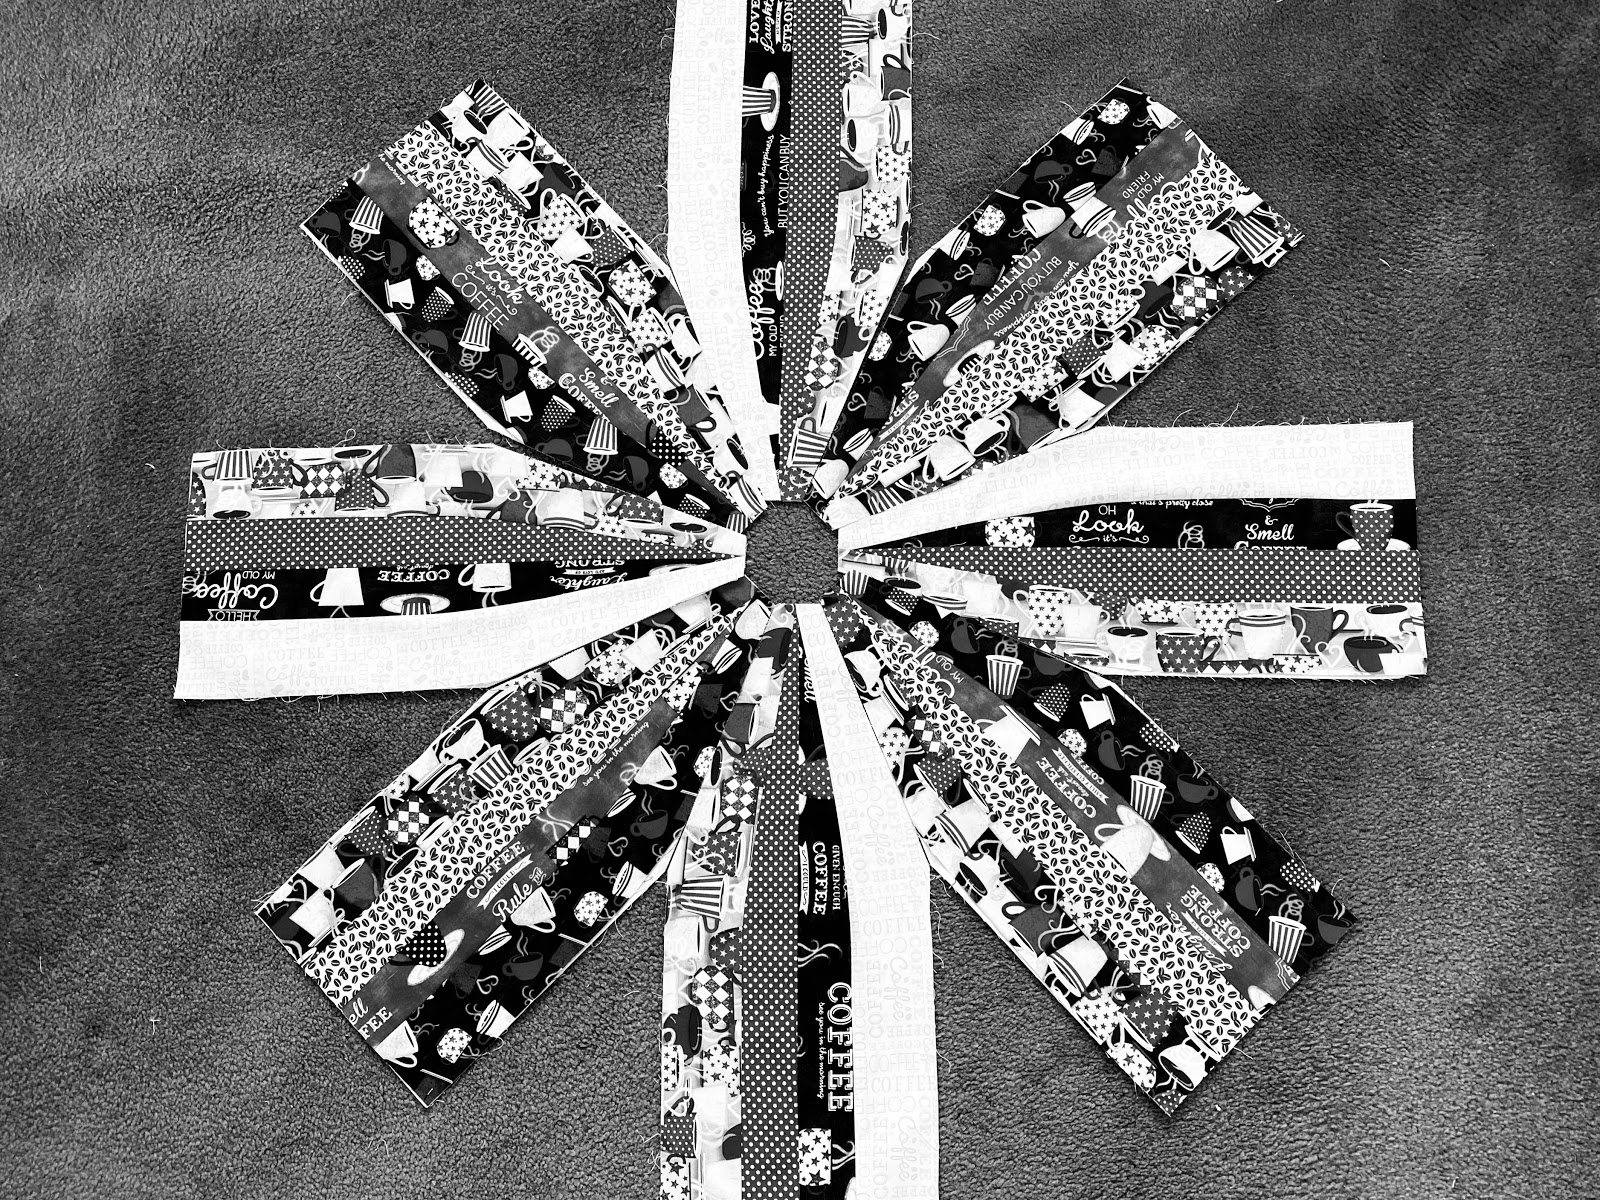
As you can see from the noir photo, the fabric that stood out the most, was the cream, so I decided to sample some cream fabric over the button just to see if this was the fabric to use for the middle, I had another in mind until I took this photo.

Yes, I decided this was the fabric I would go on to use.
Now I was ready to sew each eighth together, this again is best done in sets so as not to sew the wrong two seams together.


Then I pinned the quarters to each other, ready to sew.
Hint : Always double check the correct seams are being sewn together, this is where mistakes are made And I did find myself unpicking a seam here and there because it’s so easy to turn the fabric and sew the wrong two seams together 😫.


Now my tuffet quarters were ready to sew together to make two halves and then the both halves to create a whole.

Lastly I stitched my nylon thread about an inch from the bottom, this is to help pull the fabric in once the cover is over the foam / wood.

My tuffet was now ready to assemble.
My husband had already cut me my round wood and installed the appropriate t-nuts and holes required.
I laid the foam in the middle of the upholstery batting, big enough to be able to pull up over the foam and stapled it tight to the wood. Trimmed off the excess batting, found the top center and marked with a sharpie.


Used my upholstery needle to keep things centered as we pulled on the cover, it’s a very tight fit. Once this was done and we were happy everything looks centered, we attached the button, feeding the strings from the button through the foam and then added the crevice to the center.


Next I cut my bottom fabric into a 16” circle and placed it onto a fusible fleece batting that adheres to fabric when heat is applied. Ironed batting to the fabric and then sewed a small seam around the edge to finish the edges nicely 👌. I cut another circle of batting to give a thicker cushion between the bottom and the staples and thread that can be felt through the fabric.

Attached the bottom fabric to the base, using the bun feet and upholstery tacks.
Ta dah 👌


No comments:
Post a Comment